How to Make a Snake Game in JavaScript (Step-by-Step Tutorial)
If you want to learn how to make a snake game in JavaScript, this is the project that teaches you the most in the least amount of code. In this step-by-step tutorial you will build a fully playable Snake game using nothing but HTML, CSS and JavaScript — no libraries, no game engine, just the HTML5 canvas and a handful of core programming concepts: coordinates, arrays, keyboard events and a game loop.
By the end you will understand exactly how snake movement, food generation, collision detection and score tracking work, and you'll have the full source code to run, tweak and extend. You can also try the finished game live in the WSNCode Editor as you follow along.
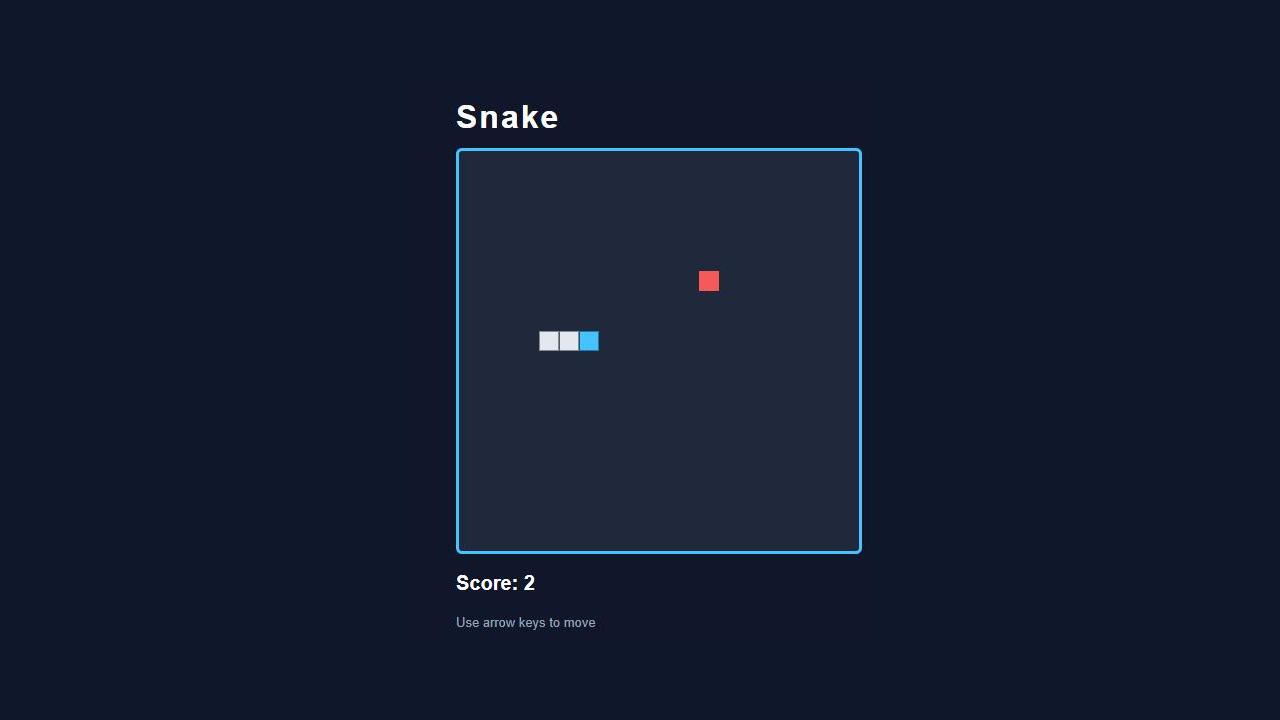
What You'll Build: A Snake Game in JavaScript
A classic grid-based Snake game: a snake made of square segments moves around a canvas, grows every time it eats a piece of food, and the game ends if it hits a wall or runs into itself. You'll control it with the arrow keys, and a live score counter tracks how much food you've eaten.
Step 1: Setting Up the HTML Canvas
Everything the player sees is drawn onto a single HTML5 <canvas> element. We also add a title, a score display, and a small hint for the controls.
<div class="game-wrap">
  <h1>Snake</h1>
  <canvas id="game" width="400" height="400"></canvas>
  <p id="score">Score: 0</p>
  <p id="hint">Use arrow keys to move</p>
</div>
A 400×400 canvas divided into a 20px grid gives us a clean 20×20 board — plenty of room to move without the game feeling cramped.
Step 2: Styling the Game with CSS
The CSS here is mostly cosmetic, but it matters: a dark background and a bright canvas border make the game readable, and centering everything keeps the layout simple.
body {
  display: flex;
  flex-direction: column;
  align-items: center;
  background: #0f172a;
  color: #fff;
  font-family: Arial, sans-serif;
  padding-top: 24px;
}

canvas {
  background: #1e293b;
  border: 3px solid #00c2ff;
  border-radius: 6px;
}

#score {
  font-size: 20px;
  font-weight: bold;
  margin-top: 14px;
}
Step 3: Setting Up the Game Variables in JavaScript
Before drawing anything, grab the canvas and its 2D drawing context, and define the state the game needs to track: the snake's body (an array of {x, y} grid positions), its current direction, the food's position, and the score.
const canvas = document.getElementById('game');
const ctx = canvas.getContext('2d');
const box = 20;
const gridSize = canvas.width / box;

let snake = [{ x: 9 * box, y: 9 * box }];
let direction = 'RIGHT';
let nextDirection = 'RIGHT';
let food = spawnFood();
let score = 0;
let gameOver = false;
Notice there are two direction variables, direction and nextDirection. Keyboard events can fire multiple times between two frames of the game loop — without separating "current direction" from "requested direction," a player could press two keys in quick succession and make the snake reverse directly into itself. We'll apply nextDirection once per frame instead, which keeps movement predictable.
Step 4: Handling Snake Movement
Movement is just listening for arrow key presses and updating nextDirection — with one important rule: the snake can never reverse directly into itself, so we block any turn that's the exact opposite of the current direction.
document.addEventListener('keydown', changeDirection);

function changeDirection(e) {
  if (e.key === 'ArrowLeft'  && direction !== 'RIGHT') nextDirection = 'LEFT';
  else if (e.key === 'ArrowUp'    && direction !== 'DOWN')  nextDirection = 'UP';
  else if (e.key === 'ArrowRight' && direction !== 'LEFT')  nextDirection = 'RIGHT';
  else if (e.key === 'ArrowDown'  && direction !== 'UP')    nextDirection = 'DOWN';
}
Step 5: Detecting Collisions
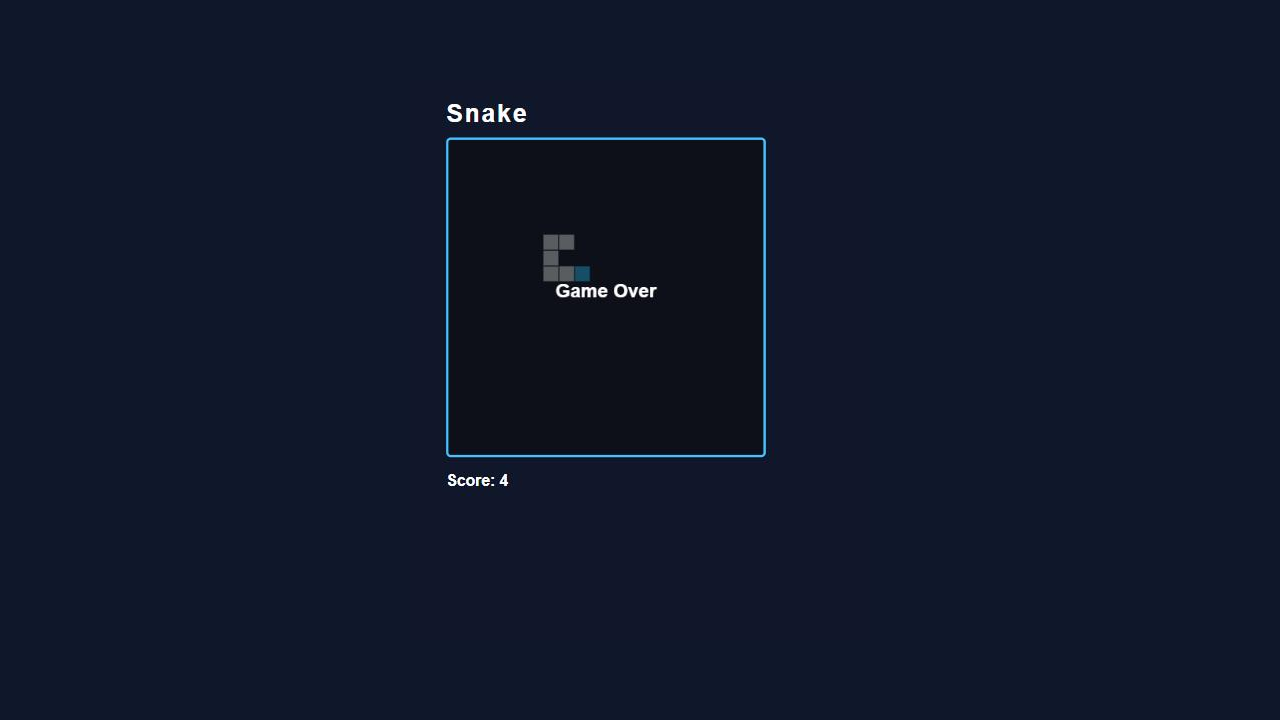
Each frame, we calculate where the snake's head is about to move, then check two things before committing to that move: did it go past the edge of the canvas, and did it land on one of the snake's own body segments?
function collidesWithSelf(head) {
  return snake.some(segment => segment.x === head.x && segment.y === head.y);
}

const hitWall = head.x < 0 || head.x >= canvas.width ||
                head.y < 0 || head.y >= canvas.height;

if (hitWall || collidesWithSelf(head)) {
  gameOver = true;
}
This is the core rule that makes Snake, Snake — everything else is presentation.
Step 6: Generating Food and Updating the Score
Food spawns at a random grid cell. It's worth checking that the random position doesn't land on the snake itself — otherwise the snake could "eat" food that's actually underneath its own body.
function spawnFood() {
  let newFood;
  do {
    newFood = {
      x: Math.floor(Math.random() * gridSize) * box,
      y: Math.floor(Math.random() * gridSize) * box
    };
  } while (snake.some(s => s.x === newFood.x && s.y === newFood.y));
  return newFood;
}
When the snake's head lands on the food, we increment the score, update the on-screen counter, and spawn new food — without removing the snake's tail segment that frame, which is what makes the snake grow by one square.
Step 7: The Game Loop
Everything comes together in one draw() function, called on a timer with setInterval. Each tick it clears the canvas, redraws the snake and food, moves the head, checks for collisions, and either grows the snake or moves it forward by dropping the tail.
function draw() {
  if (gameOver) return;
  direction = nextDirection;

  ctx.clearRect(0, 0, canvas.width, canvas.height);

  snake.forEach((segment, i) => {
    ctx.fillStyle = i === 0 ? '#00c2ff' : '#e2e8f0';
    ctx.fillRect(segment.x, segment.y, box, box);
  });

  ctx.fillStyle = '#ff5c5c';
  ctx.fillRect(food.x, food.y, box, box);

  const head = { ...snake[0] };
  if (direction === 'LEFT')  head.x -= box;
  if (direction === 'UP')    head.y -= box;
  if (direction === 'RIGHT') head.x += box;
  if (direction === 'DOWN')  head.y += box;

  const hitWall = head.x < 0 || head.x >= canvas.width ||
                  head.y < 0 || head.y >= canvas.height;

  if (hitWall || collidesWithSelf(head)) {
    gameOver = true;
    return;
  }

  if (head.x === food.x && head.y === food.y) {
    score++;
    document.getElementById('score').textContent = 'Score: ' + score;
    food = spawnFood();
  } else {
    snake.pop();
  }

  snake.unshift(head);
}

setInterval(draw, 120);
That's a complete, working Snake game in well under 100 lines of JavaScript. The interval delay (120ms) controls the game's speed — lower it and the snake moves faster.
Want to see it running and edit the code yourself, right in the browser?
Try It Live in the WSNCode Editor →Ideas to Extend This Game
Once the basic game works, here are a few good exercises to build on it:
- Add a "Play Again" button instead of leaving the canvas frozen on Game Over.
- Speed up the game gradually as the score increases, by lowering the
setIntervaldelay. - Store the high score in
localStorageso it persists between visits. - Add touch/swipe controls so the game is playable on mobile.
- Wrap the snake around to the opposite edge instead of ending the game on a wall hit.
Each of these is a small, self-contained change to the code you just wrote — a great way to practice working with an existing codebase instead of starting from a blank file.
Frequently Asked Questions
Do I need a game engine or library to build Snake in JavaScript?
No. The HTML5 <canvas> API and plain JavaScript are enough for a 2D grid-based game like Snake. Libraries like Phaser are useful for larger games, but they're not necessary here.
Why does the snake sometimes seem to reverse into itself?
This happens when a game only tracks one "direction" variable and applies keyboard input immediately instead of on the next frame. Using a separate nextDirection variable, as shown in Step 4, fixes it.
How do I make the game faster or slower?
Change the delay passed to setInterval(draw, 120). A smaller number (e.g. 80) makes the game faster; a larger number (e.g. 200) makes it slower.
You now have a complete, from-scratch JavaScript Snake game and a solid grasp of the fundamentals behind it — canvas drawing, keyboard input, collision detection, and a game loop. Try building on it in the WSNCode Editor, or check out other projects on WSNCode for more ideas and inspiration.